

Thursday, March 31, 2016
Christmas - Use Your Stash
Wednesday, March 30, 2016
Farewell Card - Teal & Ice

I used teal card stock and cut down the 12x12 to 8.5x11. I folded the card in half and adhered a piece of the designer paper by Adornit - Carolee's Creations - Cold Water Collection - Ice to the front leaving a small border. I printed the greeting with a watercolor background from Pixabay onto a piece 4x6 photo paper. This was mounted to the card front with a piece of matching card stock offset on the left hand side.
Change is for sure so as we transition to a reality we will see and do new things. Adventure awaits for all of us.
Note Card & Encouragement Card Gift Sets

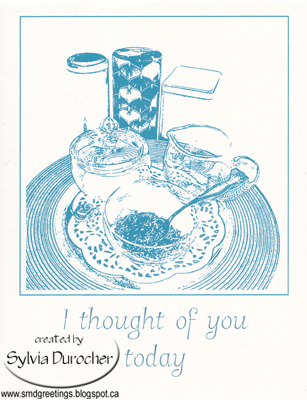
I created some new encouragement cards in the portrait orientation with some great art from Pixabay. The hummingbird and mushroom ones are posted below.
These cards were included in these 2 gift sets along with some made with a landscape image from Maria (see image below) and some I designed a while back.
One of these will be given to a couple who is starting new roles.


Monday, March 28, 2016
Mosaic Monday - New Stuff

The next photo is a container for hair gel in my bathroom. I have used a Tupperware pump container for years. Recently my hair gel seems to be getting thicker in the container so upon investigation I discovered that it had developed a crack in the lid therefore air was getting in and my hair gel liquid was evaporating. As the pump has been discontinued I needed a solution in quick order. This ivory pearl clam shaped bottle is likely a temporary measure but fits into the neutral scheme in the bathroom.
I have decided to change the color scheme on the couch so I have moved from pink to yellow and green. The green needs a zipper inserted so that I can wash the cover when I want.
I'm sharing on Mosaic Monday hosted by Judith at Lavender Cottage.
Sunday, March 27, 2016
Happy Easter

This is one of my backgrounds from a batch made in early January 2016. Enjoy.
Saturday, March 26, 2016
Baby Boy - Artemis

 I started with a deep teal card folded in half to make a large card. I cut the designer paper by Adornit - Carolee's Creations - Cold Water Collection - Ice. I printed the first part of the sentiment onto it along with the banner and then trimmed it to leave a small border. I then adhered his name in large letters which I had cut from the same card stock as the card with my Sizzix Shadow Box Alphabet dies. I adhered them along the bottom but as you can see not quite straight. I added confetti triangles to repeat the ones in the banner. The card colors complement the gift wrap I used on the gift.
Thursday, March 24, 2016
Share Your Cup 190

 We got some more snow this week. Quite a bit of the white stuff actually. Monday was a bit of a sloppy day and driving home from Card Club in the evening after it has frozen was a bit hairy. It's been cool all week with the afternoons being somewhat warmer.
 I found this tea pot tray with three tea bag holders in white ceramic at the thrift store today. I knew I had another similar tea bag holder at home so I would have a full set. They have Joshua Maxwell Studio on the bottom. Not able to find a link. The front one is not ceramic and was a gift from a friend's trip to England 20 years ago. I'm glad they all fit in the tray and keeps things tidy.
Mom and her girls day out. We are spending Saturday with our Mom crafting, talking, eating, visiting and making memories. Us girls all have crafting in our blood in one way or another. Some quilt, others paper craft, one is into needlework and my niece is into wool accessories. Some will just come to spend time with family. We will have a great time. It's potluck for lunch and dinner so I made Quinoa Salad with Asian dressing, a veggie tray and Raspberry Bavarian just like my Mom made when we were kids.


I'm sharing with Share Your Cup hosted by Carol at Art and Sand.
Monday, March 21, 2016
Card Club - March - Pick Up Truck

Card Club - March - Sunburst Birthday


I started with a royal blue card. I cut the background red checkered gingham designer paper at 4.00 x 5.5 inches leaving the small border. I adhered it to the card front. I cut the warm yellow sunburst with the Stampin Up Sunburst thin die and adhered it to the card front and trimmed the rays to the edge of the card. The greeting is a combination of a scalloped circle in the same color cut with the Spellbinder Nestabilities Large Circle set - No.2 from the centre. The greeting is color printed the punched with the 1 3/8 inch Stampin Up punch. These are glued together then the greeting is adhered to the card front with 3D foam tape.
Card Club - March - Peacock Feathers

Card Club - March - HB Initials

This card features a set of large initials. The ivory panel already had the turquoise and grey vine pattern on the left. I repeated these colors with grey in the initials and turquoise in the greeting and printed it onto the right hand side. I adhered the panel to the front of a turquoise card. Then, I have added three handmade paper flowers with each having a turquoise sequin in the center held in place with a blue tiny brad. I placed them somewhat randomly.
Sunday, March 20, 2016
Friday's Hunt 12
 I'm joining Friday's Hunt hosted by Teresa at Eden Hills. The prompts this week are:
Start with L
Favorite
Lace
I took a shot of a glass lamp my niece made for me many years ago. I have never filled it but it is beautiful. It came with the copper star base. It repeats the star theme as you can faintly see the star etched above the peace.

This dish is my favorite photo this week. I attended a Vintage Sale yesterday and bought myself this little glass dish. It catches the light well with so many glass pebbles on the under side. The dish I have been using is divided so I needed when I can't fill all the spaces in the divided one. It has traces of gold on the edge but it's pretty much all gone. I placed it on one of my blue plates and put a few blue/green glass gems in the center to create a focal point.

Saturday, March 19, 2016
Vintage Bazaar - Today

Drop by and say hi today! For my handmade items, I will have 2016-17 photo calendars - Retro & Beauty, Greeting Card Gift Sets, Nifty Notes, Alphabet Photography, Birthday Invitations which can be personalized.
There will be vintage items at some of the vendors. I have a few items myself.
Looking forward to see you there if you are in the area.
Update:
Below is a list of the vendors I spent the day with who had very good variety of vintage product to sell. Some of the items available were: vintage brooches, linens, chairs, toys, vinyl, photos, pottery, glass, a bingo ball machine from the 20s, cast iron lamp, wagon wheels, wood drawers, furniture and much more.
Alberta Vintage - Jenna
Aunty Olive's Basement
Blueberry Pie Vintage - Sherry
Corey & Tim
Dottie's Vintage - Jenn
Grandma's Vintage Everything
Lemon Bar Vintage
Relic's Relics
Terrariums by Janice
Friday, March 18, 2016
Nifty Notes - Retro, Vintage & MyPics


Wednesday, March 16, 2016
Easter Cards - Sunburst


On this card I used the same textured yellow card stock. I glued the yellow polka dot sunburst to the card front. I cut another sunburst in brown designer paper. I trimmed off the 4 corners to leave a cross. It was glued over the yellow sunburst aligning the edges. The sentiment combines a copper glitter scallop circle cut with the Spellbinder Nestabilities. The 1 3/8 inch circle was punched from dark brown card stock and the sentiment was punched with the 1 1/4 inch circle.
Note: I cut the sunbursts layers at 4" wide to maximize the 12x12 paper but I'm not sure it was worth it. Alignment is a challenge. When the layer is cut at larger than the 4.25 x 5.5" then you can just trim to the card edge. Easy peasy.
Gender Reveal Party - Thank You Cards

 We were asked to bring something for the couple/baby. It was the gift opening before the baby shower.
I made these quick gender neutral baby thank you cards with the Stampin Up Little Additions stamp set. The color combination of So Saffron yellow and Lovely Lilac mauve. These are printed on store bought thank you cards. Worked out well.
Gift Card

Monday, March 14, 2016
Mosaic Monday - Tea Cupboard Project DIY


Submitting to Mosaic Monday hosted by Judith at Lavender Cottage.
Sunday, March 13, 2016
Farewell Card

 I made this card for a lady from our congregation who is moving. We will miss her and her family.
 I started with a light green parchment card stock which I folded in half. I applied a piece of Recollections Designer paper to the front cut to leave a small border. I cut a piece of light green card stock with a picket fence Die-namics thin die. I cut the piece of card stock to be narrow enough as I did not want the pickets as I was going to use it as a ribbon threader. I trimmed it to the width of the card. I taped my orange organza ribbon to the back of the DSP then ran it through the slots in the die cut. I tied the ends in a bow and trimmed the ends. The orange picks up the orange in the large flower which is the focal point.
I created a couple new Nifty Notes to include in a gift of cards for her in her new job. These again feature watercolors from Pixabay.
Saturday, March 12, 2016
Greeting Card Gift Sets - Portfolio 2 more sets


 This set has one of my lily color prints onto card stock. It was mounted onto green card stock. The Thinking of You features a small square piece of water color decorative paper. The purple daisy is hand painted onto purple handmade paper. The trio of birthday gifts are hand watercolored with a wide brush.
Greeting Card Gift Sets - Portfolio

I designed a new portfolio for selling these gifts sets. The advantage to the old packaging is that you can see all the cards and it stands on it own so may not need a container on the craft table. The front has a small label at the bottom identifying the set and the back holds the credits. The inside shows both cards. I used a 6x10 cellophane where I add the 2 labels and a piece of bond between the 2 sets. I seal the cellophane then punch holes in the center with a long reach punch through the cellophane and the bond paper. The provides strength to the ribbon feature. I string a piece of satin ribbon through the holes from the back to the inside and back to the outside and knot and trim the ribbon ends.
Happy with this system.


This set features paintings of my own. The green white lily and the birch trees are paintings I have scanned and printed on the card fronts.
The flowers are from Dover Clipart collection. The hyacinth and the lily are great flowers for this time of year.
Subscribe to:
Posts (Atom)